

 Home
Home


For further details, please contact us.
Contact Us
You’re holding a printed snack bag, a cereal box, or a shampoo label. The colors are crisp, the text is sharp, and the print covers the material evenly. How did that image get there—and how does a flexographic printing press produce that result consistently, at high speed, run after run?
Flexographic printing—commonly called flexo—is a rotary relief printing process that uses flexible photopolymer plates to transfer ink directly onto a wide range of substrates. Unlike offset printing (which transfers ink indirectly through a blanket cylinder) or gravure (which uses recessed image areas), flexo is a direct printing method: the inked image on the plate makes contact with the substrate and transfers the ink in one step.
Understanding how this process works requires a close look at the four key components at the heart of every flexo printing station: the anilox roller, the plate cylinder, the impression cylinder, and the drying system. This guide explains each component’s role in the flexographic printing process—and why getting them right is essential for consistent print quality.
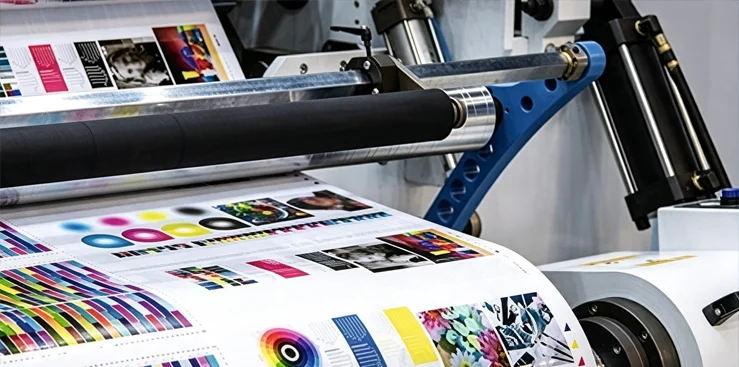
The Anilox Roller – Metering the Ink
The flexographic printing process begins with ink delivery. Every printing station on a flexo press contains an anilox roller—a hard cylinder whose surface is engraved with millions of microscopic cells. These cells are created by laser or mechanical processing on a metal or ceramic surface, and their size, depth, and density determine exactly how much ink is transferred to the printing plate.
How the anilox roller works:
-
Ink pickup: The anilox roller picks up ink from the ink fountain or from a chambered doctor blade system. The ink fills the engraved cells on the roller’s surface.
-
Ink metering: A doctor blade—a metal or plastic scraper—wipes excess ink from the surface of the anilox roller, leaving ink only in the engraved cells. This ensures that a precise, uniform volume of ink is delivered to the plate.
-
Ink transfer: The anilox roller rotates against the plate cylinder, transferring the metered ink from its cells to the raised image areas of the printing plate.
Why the anilox roller matters:
The anilox roller is often called the “heart” of the flexographic printing process. Its cell structure—measured in Billions of Cubic Microns (BCMs)—directly controls ink film thickness. Choose an anilox with too high a BCM, and you get ink flooding (blurred details, dot gain). Choose one with too low a BCM, and you get ink starvation (washed-out colors, poor coverage). The right anilox selection—matched to your substrate, ink type, and image requirements—is the foundation of consistent print quality.
In modern flexo presses, ceramic anilox rollers are preferred for their long service life, wear resistance, and corrosion resistance, especially in high-volume production environments.
The Plate Cylinder – Holding the Image
Once the anilox roller has metered the ink, the next step is transferring that ink to the image carrier: the plate cylinder.
What the plate cylinder does:
The plate cylinder is a rotating cylinder that holds the flexible printing plate. This plate—typically made of photopolymer—carries a raised, mirrored image of the design to be printed. The plate is mounted onto the plate cylinder (or onto a sleeve that fits over the cylinder) using plate mounting tape.
How ink moves from anilox to plate:
As the anilox roller rotates against the plate cylinder, the ink in the anilox cells transfers to the raised (relief) areas of the printing plate. The non-image areas of the plate—which are recessed—do not receive ink. This is the defining characteristic of relief printing: only the raised image areas carry ink.
Why the plate cylinder matters:
The plate cylinder’s precision directly affects print quality. Any imperfection in the plate—or any misalignment in mounting—will show up as a defect in the printed image. For multi-color printing, each color requires a separate plate cylinder, and all cylinders must be precisely registered (aligned) to ensure that colors overlap correctly. In modern servo-driven flexo presses, registration accuracy can reach ±0.075 mm—meaning that the plate cylinders for each color station maintain alignment within a fraction of a millimeter.
Modern flexo presses are often equipped with a set of printing plate cylinders that can adapt to different printing repeat lengths, allowing the same press to handle a wide variety of job sizes.
The Impression Cylinder – Transferring the Image
With ink now on the raised areas of the printing plate, the image must be transferred to the substrate. This is the job of the impression cylinder.
What the impression cylinder does:
The impression cylinder is a rotating cylinder that presses the substrate against the inked printing plate. The substrate—whether paper, film, foil, or other material—passes between the plate cylinder and the impression cylinder. The impression cylinder applies pressure, pressing the substrate firmly against the raised, inked areas of the plate.
The “kiss impression” principle:
In flexographic printing, the impression cylinder applies what is known as a “kiss impression” —just enough pressure to transfer the ink from the plate to the substrate without damaging the material. Too much pressure can distort the plate or the substrate; too little pressure results in incomplete ink transfer.
Why the impression cylinder matters:
The impression cylinder is the final link in the ink transfer chain. Its condition—including surface smoothness, concentricity, and pressure consistency—directly affects print quality. Any irregularity in the impression cylinder can cause uneven pressure across the web, leading to inconsistent ink transfer and print defects.
In CI (Central Impression) flexo presses, a single, large-diameter impression cylinder serves all printing stations. The substrate wraps around this central drum and never loses contact with it between color stations, delivering the tightest registration accuracy—typically ±0.075 mm to ±0.1 mm. In stack and inline presses, each printing station has its own impression cylinder.
Drying – Setting the Ink
After the image is transferred to the substrate, the ink must be dried or cured before the next color can be applied—or before the finished product can be rewound.
How drying works in flexographic printing:
The printed substrate passes through a drying section immediately after each printing station. Depending on the ink type, drying can be achieved through different methods:
| Ink Type | Drying Method | How It Works |
|---|---|---|
| Water-based inks | Hot air drying | Heated air evaporates the water from the ink |
| Solvent-based inks | Hot air drying + solvent recovery | Heated air evaporates solvents; recovery systems capture emissions |
| UV-curable inks | UV or LED curing | High-intensity UV light instantly polymerizes (cures) the ink |
| Electron-beam (EB) inks | EB curing | Electron beams deliver energy directly to the ink |
Why drying matters:
Proper drying is essential for several reasons:
-
Prevents smudging and set-off: If ink isn’t fully dried before the substrate contacts another surface, it can smear or transfer to the back of the next layer.
-
Enables multi-color printing: Each color must be dry before the next color is applied. Otherwise, wet ink from the previous station will be disturbed.
-
Ensures ink adhesion: Properly dried or cured ink bonds securely to the substrate, preventing flaking or peeling.
In modern flexo presses, drying systems are typically located between each printing deck to ensure that each color is completely dried before the substrate moves to the next station. Some presses feature infrared heating and drying systems with adjustable temperature and independent switch control for each printing color group.
The Complete Flexographic Printing Process – Step by Step
With all four components explained, here is how the complete flexographic printing process works from start to finish:
-
Substrate unwinding: The substrate (paper, film, foil, or other material) unwinds from a roll and feeds into the first printing station under tension control.
-
Inking (Anilox Roller): The anilox roller picks up ink from the ink fountain. The doctor blade wipes excess ink from the anilox surface, leaving a precise volume of ink in the engraved cells.
-
Ink transfer to plate (Plate Cylinder): The anilox roller contacts the plate cylinder, transferring ink from its cells to the raised (relief) areas of the printing plate.
-
Image transfer to substrate (Impression Cylinder): The substrate passes between the plate cylinder and the impression cylinder. The impression cylinder presses the substrate against the inked plate, transferring the image.
-
Drying: The printed substrate passes through a drying section (hot air, UV, or other method) that sets the ink.
-
Repeat for each color: Steps 2–5 repeat at each subsequent printing station—one station per color—until the full image is complete.
-
Rewinding: The finished printed substrate is rewound into a roll. Some presses include optional slitting stations to cut the wide roll into multiple narrower rolls.
Regardless of configuration, every flexo press consists of these essential sections: unwinding, printing, drying/cooling, and rewinding.
How Press Architecture Affects the Process
The four components described above are present in every flexo printing station—but how they are arranged depends on the press architecture:
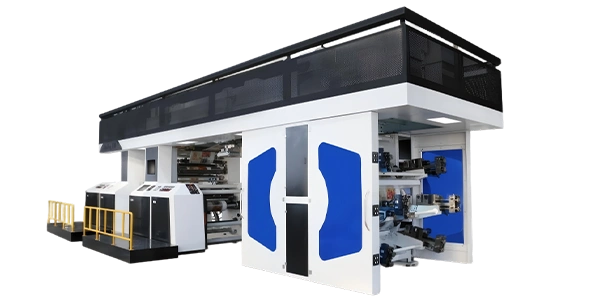
CI Presses — All printing stations are arranged around a single, large-diameter impression cylinder. The substrate wraps around the central drum and never loses contact with it between color stations. What this means for the process: Registration is exceptionally tight—typically ±0.075 mm—because the substrate is physically supported through every color. This makes CI presses the preferred choice for thin, stretch-sensitive films.
Stack Presses — Printing decks are stacked vertically, each with its own impression cylinder. What this means for the process: Each color station operates independently, allowing individual decks to be disengaged for plate changes without shutting down the entire press. Stack presses have a compact footprint and can print both sides of the web in a single pass.
Inline Presses — Printing units are arranged horizontally in a straight line, each with its own impression cylinder and drying system. What this means for the process: The linear, modular design allows easy integration of finishing modules (die-cutting, laminating, slitting) into the printing line, enabling single-pass production of finished products.
For an overview of press configurations that support different applications, explore the flexo printing machine series.
Real-World Application Scenario
A label converter adds a second press for flexible packaging
A converter currently produces self-adhesive labels on an inline flexo press. The operation wins a contract to produce printed pouches for the snack food industry—requiring printing on BOPP and PET films with 6 colors.
Key process considerations for the new press:
-
Substrate: Thin, stretch-sensitive films require a CI flexo press to maintain the ±0.075 mm registration accuracy that the design demands
-
Anilox roller selection: Different BCM values needed for solid coverage areas vs. fine halftones; the press should support quick anilox changeover
-
Drying: UV-curable inks required for non-absorbent film substrates; the press must be equipped with UV curing units at each station with adjustable energy output
-
Plate cylinder flexibility: The press should accommodate different repeat lengths for various pouch sizes
For substrate‑specific guidance for various packaging applications, explore our flexible packaging press solutions.
Next Steps – From Understanding the Process to Equipment Selection
By now, you should have a clear understanding of how the flexographic printing process works:
-
The anilox roller meters a precise volume of ink and transfers it to the printing plate
-
The plate cylinder holds the flexible printing plate with the raised image areas
-
The impression cylinder presses the substrate against the inked plate to transfer the image
-
The drying system sets the ink using hot air, UV, or other methods
The next logical step is moving from understanding the process to evaluating specific equipment. Key questions to ask when considering a flexo printing machine:
-
What substrates will you print on? Films, paper, or board? This determines whether you need a CI, stack, or inline press architecture.
-
What are your quality requirements? Registration accuracy (±0.075 mm vs. ±0.1 mm vs. ±0.15 mm) depends on your application.
-
What ink types will you use? Water-based, solvent-based, or UV-curable? This determines your drying/curing system requirements.
-
Do you need inline finishing? Die-cutting or slitting may require an inline press configuration.
-
What is your typical run length? This affects whether CI (long runs) or inline/stack (frequent changeovers) is more cost-effective.
Review the flexo printing machine series to compare configurations across CI, stack, and inline architectures. For project‑specific technical consultation regarding press selection and application requirements, contact our service and support team to receive substrate‑specific guidance and professional feasibility assessments.
Related Reading
-
CI vs Stack vs Inline Flexo Presses: Which Fits Your Production Line?
-
Understanding Anilox Roller Selection for Quality Flexo Printing
-
How to Choose the Right Flexo Press for Food Packaging Applications
-
Flexo Printing Inks: Water-Based vs UV vs Solvent